Updated November 2019
Metal Detecting for Beginners was written for those of you who are thinking about getting into metal detecting or for those of you who recently started metal detecting and need good advice. I can provide that advice. I want to help you get the most enjoyment out of this hobby.
What is in this article? Metal Detecting for Beginners will provide everything you need to know about metal detecting and the reality every beginner should know. In addition, I’ll help you determine which metal detector is best for you, the equipment you need, how to get metal detecting permissions, and what you shouldn’t do as a beginner. Finally, I’ll leave you with an important note about metal detecting laws that vary from state to state.
The Rush of Adrenaline.
Finding your first old coin or relic is like having your first born child.
When I got into this hobby during the mid 1990’s I had no idea how much fun and addicting metal detecting could be. Once you pull up your first old coin or button you won’t forget the time and place you found it. Finding your first old coin or relic is like having your first born child. The experience is that intense. But that’s why metal detecting is so addicting. That rush of adrenaline is what keeps all of us in the hunt.
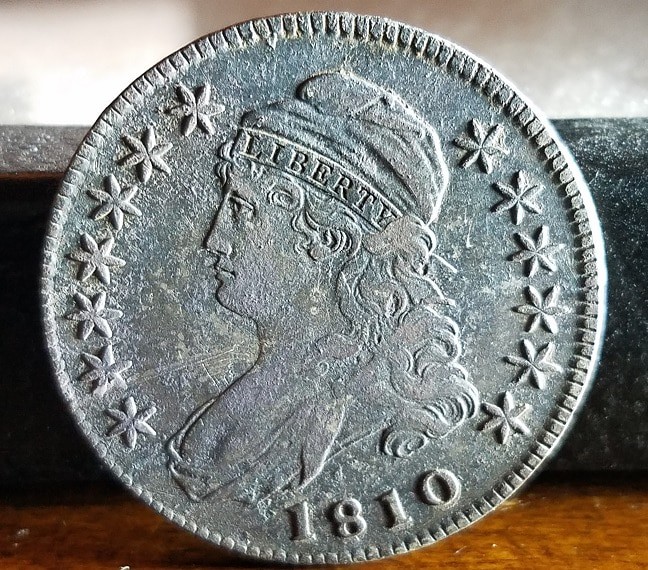
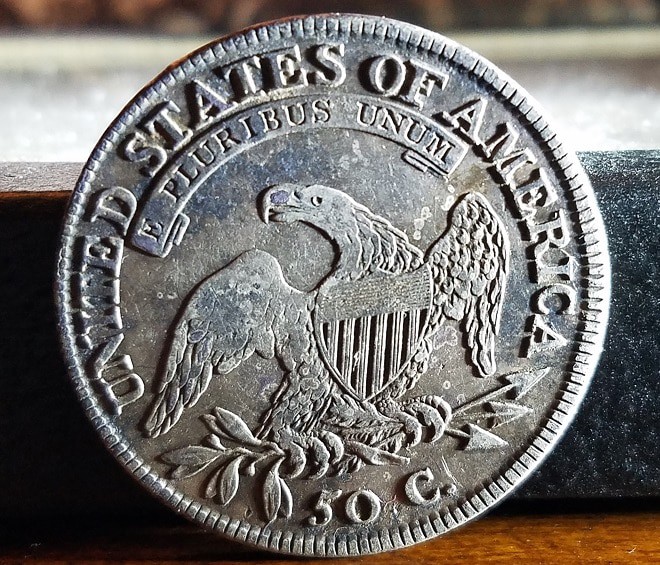
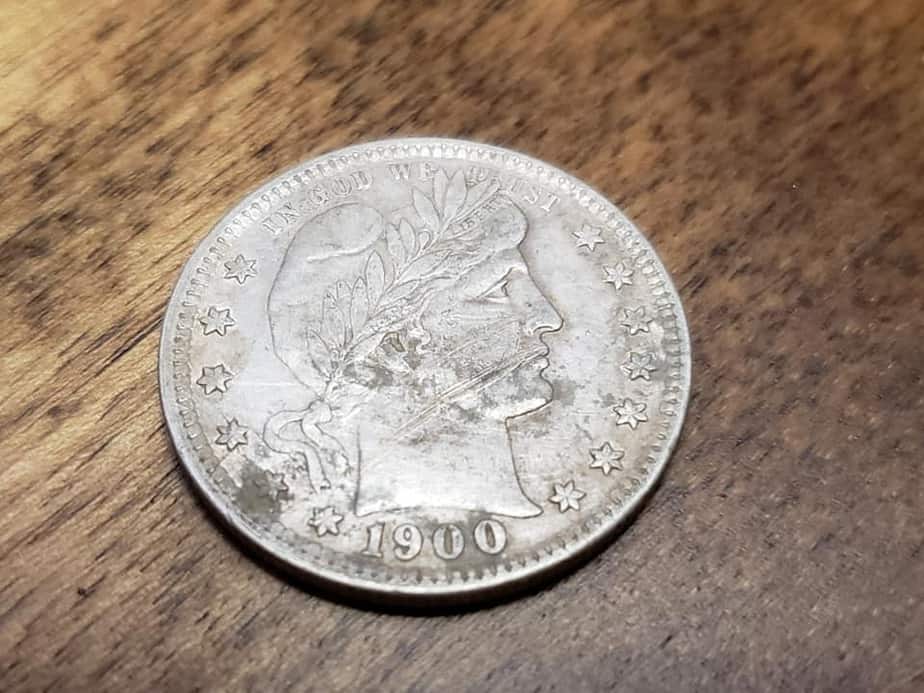
For instance, when I found this 1810 silver half dollar (below) a couple of years ago. I almost did back flips across the yard. This coin is probably the best coin I have ever found to date. You can watch the video of the day I found it by clicking here. But don’t leave just yet. The good stuff is coming up next!
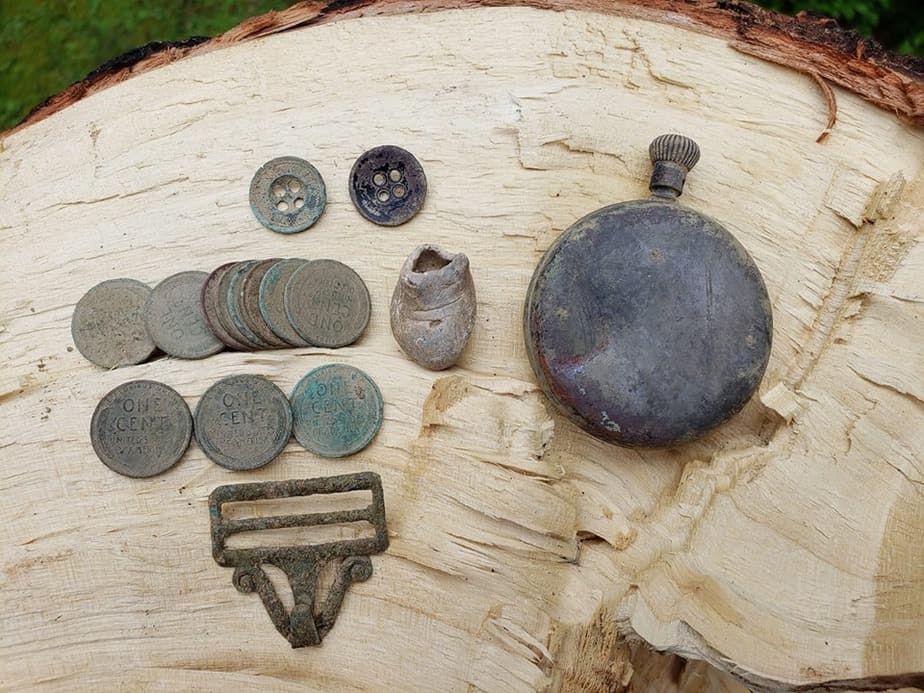
Each plug of dirt offers a surprise. Forrest Gump once said, “Life is like a box of chocolates, you never know what you are gonna get”. That is also true about metal detecting. You just never know what that that clump of dirt is going to give up. It could be an old coin, a ring, a civil war bullet, a cannon ball, or even GOLD! You just never know.
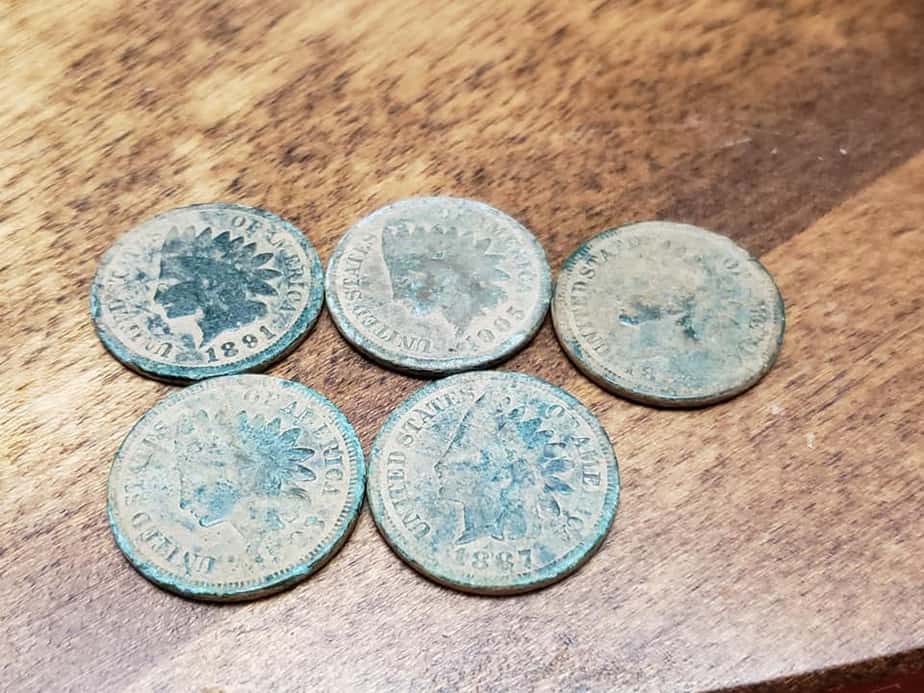
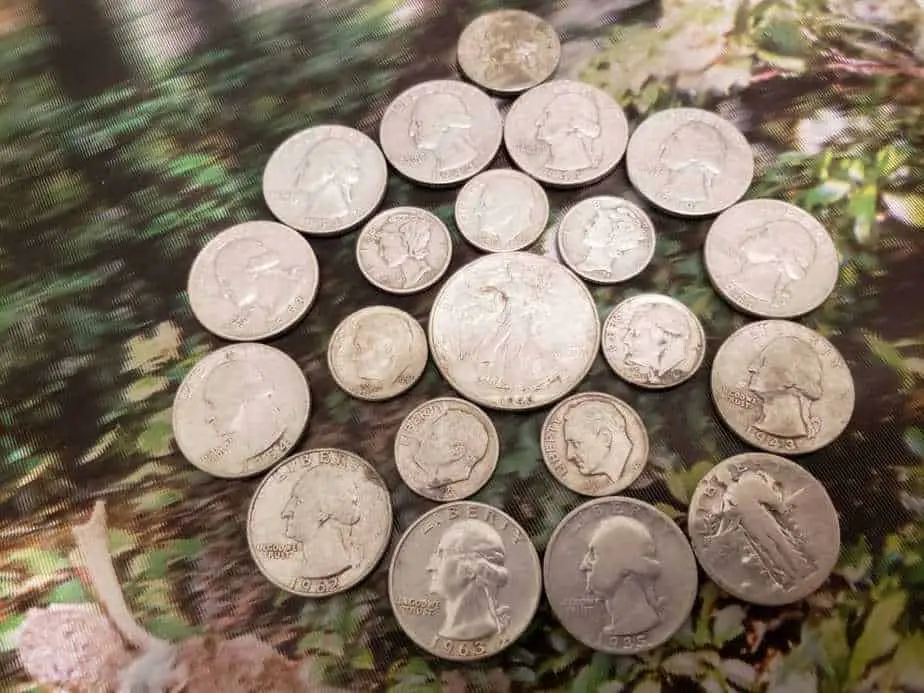
What Can Beginners Expect to Find?
Once you start metal detecting you will be eager to get out there and dig your first plug of dirt. Many of you will find something amazing your first at bat. We all want to find items like old coins, silver coins, gold coins, buttons, jewelry, civil war relics and GOLD. We all watch the YouTube videos of amazing items coming out of he ground. Unfortunately, its not as epic as some of the metal detecting stars on YouTube portray the hobby to be. Very few of them are honest and up front about their hunts. But you can’t blame them, who wants to see 50 dig holes of nails and trash before a silver coin pops out of the ground. I don’t and you probably don’t either.
In reality, some of these items like old coins and relics are not that hard to find. But there are a lot of other things you will be digging that will drive you crazy. There is a harsh reality behind metal detecting that I will go over next. But don’t be get too worried. I’ll break it to you gently.
The Reality of Metal Detecting
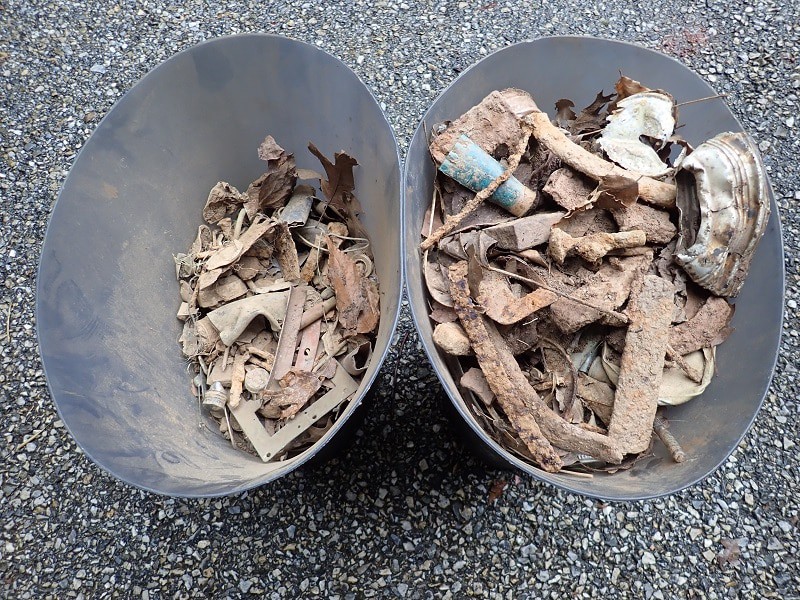
If you are just starting out metal detecting, I need to be up front with you about this hobby. During the first few months of your metal detecting adventures, there is a high likelihood that you aren’t going to find much of anything except a lot of trash. But don’t get discouraged, this is normal. Once you put some time your metal detector and start to understand what your machine is telling you, the signals and sounds will start to make sense. Here are some of most common trash items you will more than likely dig up in the beginning:
- Rusty nails (a lot of them)
- Aluminum pull tabs (sound just like coins)
- Aluminum cans
- Aluminum foil
- Bottle caps
- Mason Jar lids
- Iron items (in farm fields you will dig up plow parts and horseshoe parts)
- Shotgun shells (fired more than likely)
- Brass bullets/modern bullets. (a lot of them and they sound really good)
Dig every signal for awhile to understand the tones and what the machine is trying to tell you.
Every time I purchase a new machine, the first few weeks are spent digging every signal I hear because I want to know what aluminum cans sound like. I want to see how a bullet rings up on the VDI. At some point, I want to be able to know that I’m digging or choosing not to dig a bottle cap. If you don’t listen to every signal to understand what it could be in the beginning, it will take you longer to fully grasp and figure out your machine.
Frustration and Discouragement Will Set in But its Normal.
While metal detecting for beginners can be a lot of and rewarding, the harsh reality of metal detecting is that its a lot of hard work and many of you will give up after a few weeks. If you are still digging after 6 months you might be hooked. If you make it to a year and have over 100 hours of time on your metal detector, then congratulations, you are probably hooked on the hobby for life. Most people never make it past 3 months. They give up because all they find is trash like the items I listed above. Frustration can set in but Don’t get discouraged and do NOT give up! There will be a moment when everything will start to make sense. It just takes time.
What is The Best Metal Detector to Buy For a Beginner?
Now that we’ve gone over the harsh reality of metal detecting, its time to get down do business and talk about the type of metal detector you are going to need. What is the best metal detector to buy for a beginner? This really depends on your budget and what you are willing to spend.
There are entry level machines that start out in the $100+ range but be careful, the higher the price, the more sophisticated the machines tend to get. If I had to pick a machine for a beginner, I think the Garrett ACE line of metal detectors would be a great machine to start with (no they are not sponsoring me to write this article). They are easy to use and aren’t overloaded with features that will only confuse the average beginner.
I provided a list below of the machines I think would be make decent/good entry-level machines that won’t break your bank. However, I did include the Minelab Equinox because I think it is pretty easy to use but it is more of a mid-level machine. I’ll provide links below where you can check Amazon for the cheapest prices and get more information about each of the machines.
Metal Detectors for Beginners.
- Garrett ACE 200
- Garrett ACE 300
- Garrett ACE 400 (mid level but easy to use)
- Garrett AT Pro (mid level but easy to use)
- Whites Coinmaster
- Fisher F22
- Minelab Equinox 600 (mide level, easy to use but higher in price)
Keep in mind that if you are just beginning to metal detect, you don’t need anything that is going to break the bank. Stick to the basics and learn your machine. The last thing you want to do is spend a lot of money on something you won’t enjoy.
So You Bought Your First Metal Detector Now What?
Once you purchase your first machine, you are going assemble it, install or charge the batteries, and probably run outside to try it out. Many of you are going to turn it on and be completely dazzled by what you are seeing and hearing. The majority of you are going to be scratching your head and wondering what you got yourself into. But don’t worry this is normal. Here are 4 metal detecting tips your need to know in the beginning.
1. Ground Balance.
You must figure out how to ground balance your machine before you begin hunting with it (read the manual or watch YouTube videos). This is probably the first thing you will do every time you power on the machine. If your machine is not ground balanced correctly it could ruin your metal detecting experience. For instance, if not properly balanced, the machine could be noisy or what we call “chatty” and you will lose significant depth and the ability to find deeper targets.
If your ground balance isn’t done correctly you could have a really hard time hearing the good tones or targets because the ground is interfering with the good signals. The good news is that most machines will try to automatically ground balance for you. But I still think manually balancing the machine is always a better option. Your manual should help you figure out the ground balancing process and a lot folks are turning to YouTube for instruction videos. There might be a good video out there for your machine. Google it or search YouTube.
2. What Program Should You Start With?
Each machine usually comes pre-loaded with programs for finding coins, relics, sand/beach etc. My advice to beginners is to pick a coin program and learn it first. Don’t switch between programs. Spend a couple weeks on one program until you get a feel for what the machine is telling you and what the targets sound like. A lot of beginners will end up doing what I like to call “chasing targets” because they switch between programs all the time and their brain can’t figured out what a coin should sound like. When you switch programs the filtering of the machine can make the tones sound different.
My advice is to stick with one program until you feel confident and your brain is ready for the next program to learn. When you are ready, then repeat the learning process for the new program. Eventually, you will master your machine and know how to use it in different conditions. This process usually takes between 80 – 100 hours of time on the machine.
3. Are Metal Detecting Target IDs From The Visual Display Indicators or VDI Important?
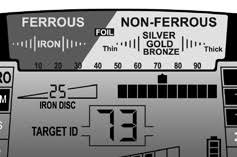
The target ID number from the VDI is very important for a beginner to learn so the answer is yes. Target ID numbers equate to a specific type of metal and how your metal detector identifies that metal. It is usually represented by a number scale.
For instance, on a Garrett AT PRO I know if I get a really sweet sounding signal and the target ID number is an 86 or 87, almost 99% of the time its going to be a quarter. Those numbers are a scale for your brain to map to in the beginning. But eventually you will get so good at your machine that those numbers won’t matter. Over time, you will know when you hear a good signal and whether you should dig it or not. But in the beginning, use the target IDs to your advantage and learn what the machine is trying to tell you. Each metal detector’s target ID will be different and the number scale will be different as well.
4. Build Yourself a Test Garden.
If you are a metal detecting beginner, I can’t stress this one enough. This tip will save you some much time during your initial learning phase. You can remove many hours of frustration by simply digging a few holes in your back yard and burying some items like, coins, bottle caps, aluminum foil etc.
Once you bury the targets, take the time and go over each target and listen closely to the sound and pay attention to the target ID. This process speeds up your brain’s ability to process the sounds and ID of the targets. After spending a few hours in the test garden, then you hit your first permission or playground (more to come on places to go to metal detecting). You are going to know what those good targets sound like and you will probably be more successful in the beginning.
Metal Detecting Gear – The Essentials.
There are only two additional items you need for your essential metal detecting gear to get yourself started and one optional piece of equipment that you will more than likely want to purchase once you have the opportunity to use one of them. Here are the additional items you need to metal detect:
Metal Detecting Bag or Pouch.
Most of time you are going to need something to carry your treasure and trash. Many of us get a bag that straps around the waste. However, I like a bag that straps on over the shoulder. Your bag can fill up and get heavy fast. You will notice the weight around your waste when your pants keep falling down. Having a bag over your shoulder put the weight on your back and not around your waste.
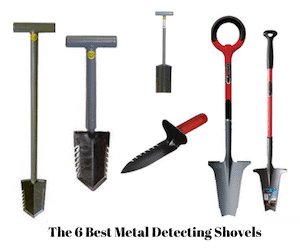
A Digging Tool or Shovel.
A digging tool is also something you are going to need. I just wrote an article on digging shovels that you nee to check out here. In the article, I go over 6 shovels that I own and why I like each one of them. Each one has a purpose and the type of metal detecting you do will determine which shovel will work the best for you.
A Pin-Pointer or Probe
The (Optional) item is a pin-pointer or what some call a “probe“. These items are hand held metal detectors that help you pin-point your targets once you have the hole dug. I highly recommend getting one because it will save you a lot of time finding your target.
Is it a must have? No, but once you use one, you’ll have to have one. I have only used three different types of pin-pointers (there are many more out on the market) and I liked two of the three. In fact, I still use both of them today. The two pin-pointers I like are the Garrett Pro Pointer AT and the XP MI-6 Pro Pointer.

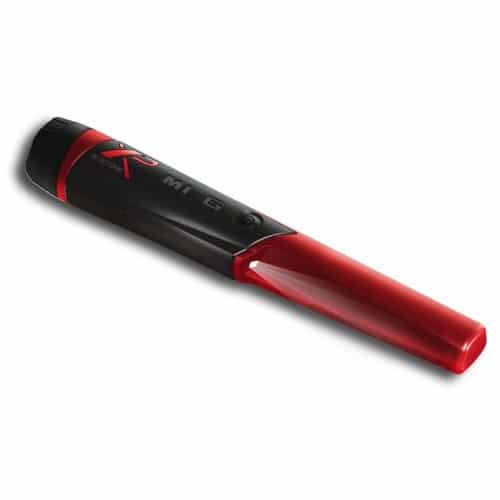
I wrote an in depth article on the MI-6 that you can read here. Both pin-pointers work well and are both 100% waterproof. I will admit that I like the XP over the Garrett. Again, I want to stress that there are many other pin-pointers out there and one or many could be better than the two I use. Do your research before pulling the trigger and buying a pin-pointer. They are truly an amazing devices that really changed the way we pin-point our targets.
Where Should You Go to Practice or Start Metal Detecting?
Now that you have all your metal detecting gear and you’ve spent some time in your test garden. You are ready to go metal detecting. But where can you go or where should you start? Most metal detecting beginners start out in public parks and playgrounds. (NOTE: Check the laws to ensure metal detecting in parks and playgrounds is allowed where you are.)
How to Get Metal Detecting Permissions.
Eventually you are going to want to ask someone for private permission to metal detect on their land. Most of the good stuff today is coming off of private property. Unfortunately, many times, land owners will deny you access to their land. You can’t blame them. They don’t know who you are and many times they don’t even know what a metal detector is. Most of the time they think you are knocking on the door to sell them something.
Canva Business Card Maker Tool
I was reluctant to ask or knock on doors myself. But over the years, I’ve finally lost the fear to approach land owners. Getting private permission is hard but I wrote an article on how to get a land owner to say yes and you can read about my techniques that really work by clicking here. In that article, I lay out some tips that keeps the land owners eyes off of you and more on what you do. Check out the article and I know your chances for landing new permissions will go up significantly.

I Hate to Say it But Fill In Your Holes!
One of worst things beginners tend to do is dig super big holes and then they don’t fill them back in. This is what gives us all a bad reputation. Quite frankly, this is the reason why we can’t dig in a lot of public places anymore. A few knuckleheads who don’t respect the land and don’t leave the ground like they found will ruin it for the rest of us.
Common sense should also come into play. If its a hot summer day and you get permission to hunt someone’s well manicured lawn, just remember every hole you dig no matter how well you dig it, the grass is going to die. Does the land owner know that? Does he mind? Common sense may tell you to wait until the fall when the ground is wet and the grass has already stopped growing. If you explain that to the land owner, 9 times out of 10 he will have more respect for you he might even get you access to another permission because of that one word RESPECT. Do the right thing and use some common sense and everything will work out just fine in the end.
What About The Metal Detecting Laws?
The laws for metal detecting vary state to state and county to county. To be truthfully honest, many of the laws are vague and aren’t 100% clear on what you can can’t do. This is why most of us know seek private permissions to hunt. But no matter where you hunt you should be knowledgeable of the laws and if you aren’t sure about a location DON’T HUNT IT until after you know for sure. Stay away from national parks and battlefields. If you are caught metal detecting in those areas you are going to JAIL! No questions asked.
You Have The Gear and The Permission Now Get Out There and Metal Detect!
At this point, you are armed with all the right gear and information. You have the permission and now its just a matter of getting out there to pound the ground. Find the time, call up a buddy and enjoy it. I find that metal detecting is one of those hobbies that recharges my batteries and puts me in a better place.
Being outdoors with nature and friends is always a great experience and I hope you enjoy this hobby as much as the rest of us do. I hope “Metal Detecting for Beginners” was helpful and I look forward to helping you in the future. Thanks for reading my article. Best of luck and happy hunting to all of you.
NOTE: Sections of this post contain affiliate links that allow you to find the items mentioned in this blog post and support the site at no cost to you. While this site may earn minimal sums when the reader uses the links, the reader is in NO WAY obligated to use these links. Thank you for your support!
Recent Posts
What Is Recovery Speed on a Metal Detector? The Complete Beginner's Guide
Part of the Mental Metal Academy Series Welcome to Mental Metal Academy Have you ever swung your metal detector over a patch of ground and wondered why your hunting partner found a coin...
Mental Metal Academy – Lesson #2 The Complete Beginner's Guide By Mental Metal | Mental Metal Detecting "Learn how to properly adjust your metal detector's sensitivity for maximum...